I was contacted recently by a police client who had identified an incriminating file name in an SQLite rollback journal who wanted some assistance getting the data into a user-friendly format. Intelligence provided was that the suspect was using Kik messenger on an Android device and had deleted a number of messages. The file itself, a jpeg, had been found but they needed to link it back to the message and put it in context with the other messages around it.
The process I suggested using the Forensic Toolkit for SQLite is rather straight forward and is detailed at the end of this article. But, I thought I would write up some of my observations on whether to manually ‘rollback’ the journal myself and why I chose not to do so.
SQLite maintains two sorts of journals, the older rollback journal file, that I will discuss in most of this article and the new Write Ahead Logging (WAL) file that I won’t cover here (however the same technique offered at the end of this article can be used to deal with WAL files). Only one journal type can be used at any one time. Journals are maintained so that if an error occurs while updating a database, SQLite can revert back to the last good position i.e. before the write transaction took place.
When a record is updated, created or deleted in a database that utilises a rollback journal the entire database page that contains that record is first copied to the rollback journal file. The database is then updated. If SQLite crashes when it restarts it checks the journal for valid entries (more on ‘valid’ later) if any are present it “rolls back” the journal, i.e. copying the pages from the journal back into the database.
Database updates normally take place as part of a transaction and usually a lot of records are updated at once, for instance if multiple records are updated or deleted. When all the transactions are complete the changes are ‘committed’ to the database. The records for different tables are stored in the database in pages, so if multiple pages are updated as part of a transaction then multiple pages will exist in the journal.
A valid journal starts with a header section that is padded out to the size of 1 sector (so usually 512 bytes) the sector size is recorded in the header. Only the first 28 bytes of the header are actually used. The header also records the number of pages in the current journal, a random seed (known as a nonce) used to calculate a checksum for each page and the database page size.
This is followed by the stored pages from the database with each page stored consecutively as follows:

http://www.sqlite.org/fileformat.html
There are a few points to note from the description at the file format link above:
- The journal is only valid if it contains a valid header
- The same page must not exist more than once in the journal
- The checksum for each page is calculated on certain bytes with the nonce from the journal header
- A new nonce is used for each transaction
- When a transaction is committed, a journal is marked as invalid by either – deleting it, truncating it to 0 bytes or clearing the journal header sector.
In practice when a transaction is committed it seems that the journal header is normally zeroed and the data in the journal remains. This is not a problem when it comes to reading each page from the journal as we can obtain the page size from the database itself and as discussed above, the header is almost invariably 512 bytes.
However, there is a complication. If a large amount of data, say 1000 pages, is written to a journal and then committed, these 1000 pages remain after the transaction is committed and just the journal header is wiped. If the next transaction contains just 3 pages then these 3 pages overwrite the first 3 pages of the previous transaction. The next transaction might be 30 pages, etc. This of course could, and does, happen multiple times with different page counts.
What this means in practice is that the journal often contains data from multiple previous transactions. If the header is present then the page count field in the header can be used to determine what pages belong to the current transaction, or the checksum (using the nonce) could be used to determine the valid pages. As mentioned above it is unusual to see a non zeroed header.
In the journal sent to me the first 21 pages were as follows:

If the header had been intact we could use the nonce (sometimes referred to as a SALT) from the header and the data from the stored page to verify the checksum of each page in turn. Once we have a mismatching checksum we know that all of the pages prior to the first mismatch and all of the pages further on (including the first mismatch) are from one or more previous journals
We can see that DB page 1 is at journal pages 3 and 4 and DB page 90 is at pages 14 and 21. Referring back to our bullet points above we see that a page can only exist once in a valid journal, so from this, we can conclude that pages from at least three transactions are present in this journal.
As page one of a database is always updated when a database is using journal mode (not WAL mode) we can make an assumption that the last write was pages 86, 4 and 1, because the specification says that a page from the database can only occur once in any valid journal, therefore database page 1 at journal page 4 MUST be from a previous backup. Likewise, we can also say that the journal changes again somewhere between journal page 15 and journal page 21 (because database page 90 can’t appear twice in the same journal).
Back to the problem of viewing the data, what are our options?
We could roll back the complete journal anyway (we would need to write a program to write every single page in the journal back to its correct location in the database. This I decided was too fraught with potential problems. Page 1 is just the DB header and this is updated on every database commit, but DB page 90 is also present in the journal in 2 locations, so which one do we use.
I don’t like this idea!
We could insert every record in every page in the journals into the KikDatabase.db file (the main SQLite database for Kik). This also has its problems:
We know that there are multiple transactions in the journal, therefore, there may be multiple copies of the same record. The ID for each row in messagesTable is an integer primary key (see later) and the table constraints for a primary key (must be unique) would be broken if we tried to insert more than one record with the same id. With more complex database schemas this issue becomes even more relevant. Or what about inserting an internal leaf page that broke the parent-child relationships in the binary tree in which each table is stored?
Even if this was successful the data from the journal would now be interspersed with the data that currently exists in the live database and there would be no way of differentiating between the two sets of records.
I don’t like this idea!
We could try and determine where the last valid journal ends and roll back just those entries up until there. But this point is not always obvious and it still doesn’t get the pages beyond the last ‘good’ page that we choose.
So I don’t like this idea either!
The solution I chose turns out to also be the simplest one and required no new code, Use Forensic Recovery for SQLite to carve directly from the journal and create a new database with just the records from the journal. All we need to do is ensure that a template is created for the KikDatabase, this can be done by just pointing Forensic Recovery for SQLite at the existing database when following the wizard (these steps are very straight forward and are detailed later). Forensic Recovery for SQLite will display tables as per the original schema (with constraints removed so duplicate records are allowed) showing all of the records, it also creates a new SQLite database that we can examine with the Forensic Browser for SQLite.
Although a report can now be created on the database we have populated with the content of the journal, it makes sense to take one further step. As our brief is to look specifically for deleted records we need to filter the recovered data to remove those records in the journal that still exist in the live database. Remember that if a single record is deleted from a database then the complete page, including all other records in that page – whether they have been deleted or not, will be copied to the journal, so the journal will normally contain deleted and copies of live records.
To understand how we can do this let’s digress a little and look at the SQL for the messagesTable – as follows:
Code:
CREATE TABLE messagesTable (_id INTEGER PRIMARY KEY AUTOINCREMENT, body VARCHAR, partner_jid VARCHAR, was_me INT, read_state INT, uid VARCHAR, length INTEGER, timestamp LONG, bin_id VARCHAR, sys_msg VARCHAR, stat_msg VARCHAR, stat_user_jid VARCHAR, req_read_reciept BOOLEAN, content_id VARCHAR, app_id VARCHAR, message_retry_count INT, encryption_failure BOOLEAN default 0, encryption_key BLOB, render_instructions VARCHAR)
Of particular relevance is the first column “_id INTEGER PRIMARY KEY AUTOINCREMENT”
This column states that the _id is the primary key – this means that this field must be unique. It also states that this field ‘auto-increments’, this means that even if a row is deleted the next inserted row will not re-use the deleted _id rather it will be auto-incremented from the last (largest) value used.
Incidentally, the next value to use for auto-increment is stored in the sqlite_sequence table. In our database this table, as shown below, tells us that the last _id used for messagesTable was 7603, i.e. the next to be used will be 7604.

So within the Forensic Browser for SQLite we create a query that filters the recovered data based on the _id field and restricts the returned data to those rows that do not exist in the original. First, open the live database – this database will have a fully qualified prefix “main”. Now attach the recovered database and attach it as “recovered” and paste the query below into the SQL query editor and execute the query:
Code:
SELECT *FROM recovered.messagesTable

WHERE recovered.messagesTable._ID NOT IN

(SELECT main.messagesTable._id FROM main.messagesTable)
In English this does the following, row by row:
a) Selects all of the messages from the recovered table
b) but, only if the ID of the record in a) is not in:
c) the list of the complete set of _id fields returned from the live (main) database.
So basically the query will just return those rows carved from the journal that are not in the current live database. The main browser display will look as follows:

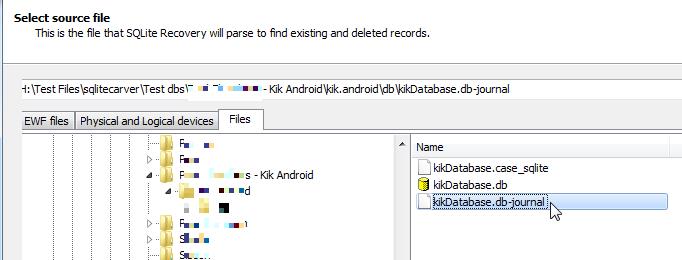
- Run Forensic Recovery for SQLite and work through the wizard
- When you get to the templates page, “right click” the “Apps table” and choose “import tables from SQLite databases”

- Navigate to the KikDatabase.db file and select it
- Call your template something like “Kik – Android”

- Make sure just the new template that you create (Kik – Android in my example) is check marked (you don’t want tabs to be created for all the other applications)
- Uncheck the “Search for database definitions” box – there is no need as we are carving from a known journal

- Finally select the KikDatabase.db-journal file, under the files tab