This article describes how WAL files work and how to deal with them forensically – the steps are very straight forward with the Forensic Toolkit for SQLite and the article takes you through them. I will go into a little detail regarding the format and usage of a WAL file, some of the forensic implications of recovering data and present two methods for recovering the data without missing or overwriting existing records.
WAL file overview
In order to maintain database integrity, SQLite often makes use of WAL files. At a very basic level, WAL files are easy enough to incorporate into a parent SQLite database – you just need to open the parent database in SQLite. WAL files are a form of cache whereby data that is written to an SQLite db is first written to the WAL file (when this is enabled) and then at a later time (known as a checkpoint) the SQLite data is written into the main database. So from a forensic viewpoint, the existing database is an older version of the data and when the WAL is checkpointed you see the current version.
So to incorporate a WAL file just open the main db in SQLite. SQLite will see the existing WAL file in the same folder as the main database and will assume that an error has occurred (application/computer crash) and will automatically checkpoint the WAL file and add the changes to the main database.
SQLite writes a value known as a Salt to the WAL file header, this salt is also written to each frame header for each page in the WAL file (the page header and page data itself are known as a frame).
So if pages 3, 7, 9, 32, 4 are updated (in that order) and the salt is 1234 then the WAL file will look as follows.

So in the same checkpoint if pages 7, 6, 7 are updated (in that order) the salt is still 1234 then the WAL file will look like this:
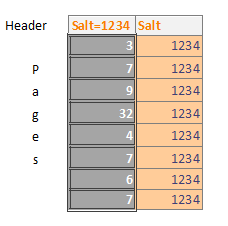
So a WAL file can contain multiple differing copies of a page.
A checkpoint occurs when the WAL files reach 1000 pages (this is configurable in SQLite) or when the programmer forces one. At this point, each page will be written back to the main database in order so only the last version of page 7 in our example would be seen by an investigator using SQLite to write a WAL file.
It gets more interesting though. When a checkpoint occurs then the WAL file is not deleted, rather the next set of pages are written from the start of the WAL file.
SQLite determines what is current by means of the salt value and to do this it ensures that the salt value changes for each checkpoint.
Our example below shows our WAL file after a checkpoint has occurred and then three new pages have been updated – pages 5, 7 and 2. This new WAL file has the new salt (6789) written to the header and to each new frame header. So when SQLite writes the content of a WAL file back to the database, it first reads the salt from the WAL header and checks each frame in the WAL file to make sure that the salt matches – when it reaches a salt that doesn’t match it stops writing data. This means that any frame in the WAL file that has a different salt will never be written back to the main database (essentially this has already happened at a previous checkpoint). This data could of course be forensically valuable.
It can be seen from the image below that the WAL file contains 5 pages from the previous checkpoint, without tools such as SQLite Forensic Explorer there is no way to look at the contents of these pages in “WAL Unused”.

So we have in effect unallocated space in a WAL file that contains records from the previous checksum.
So how can we examine a WAL file?
Forensically the normal method of looking a at WAL file is to take advantage of the fact that when an SQLite database is opened if a WAL file is present then the content of the WAL file will be written to the main databases (i.e. it is checkpointed). There are a number of problems with this approach.
1. Old data in the main database file is overwritten by the data from the WAL file potentially losing evidentially valuable data
2. The WAL file may contain more than one version of a page
3. The WAL file could contain deleted data in unused space
4. WAL files can contain data that has previously been written (checkpointed) to a database and may subsequently have been overwritten
It follows therefore that a better approach could reveal evidence that might otherwise be lost – There are two methods:
1. Use Forensic Recovery for SQLite to carve all the records from the WAL file and insert them into a new database
2. Use SQLite Forensic Explorer to look at the WAL file page by page.
I will discuss both methods:
SQLite Forensic Recovery and Explorer are only available as part of the SQLite Forensic Toolkit, more information here.
Forensic Recovery for SQLite
This solution is the simplest one, Use Forensic Recovery for SQLite to carve directly from the WAL and create a new database with just the records from the WAL. All we need to do is ensure that a template is created for the Database, this can be done by just pointing Forensic Recovery for SQLite at the existing database (the DB associated with the WAL) when following the wizard. Forensic Recovery for SQLite will display tables as per the original schema (with constraints removed so duplicate records are allowed) showing all of the records, it also creates a new SQLite database that we can examine with the Forensic Browser for SQLite. The steps are:
- Run Forensic Recovery for SQLite and work through the wizard
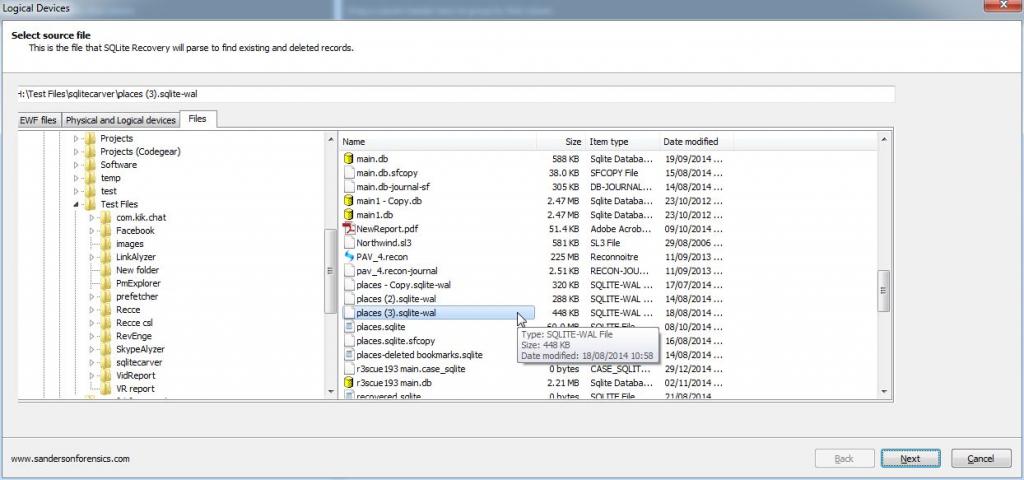
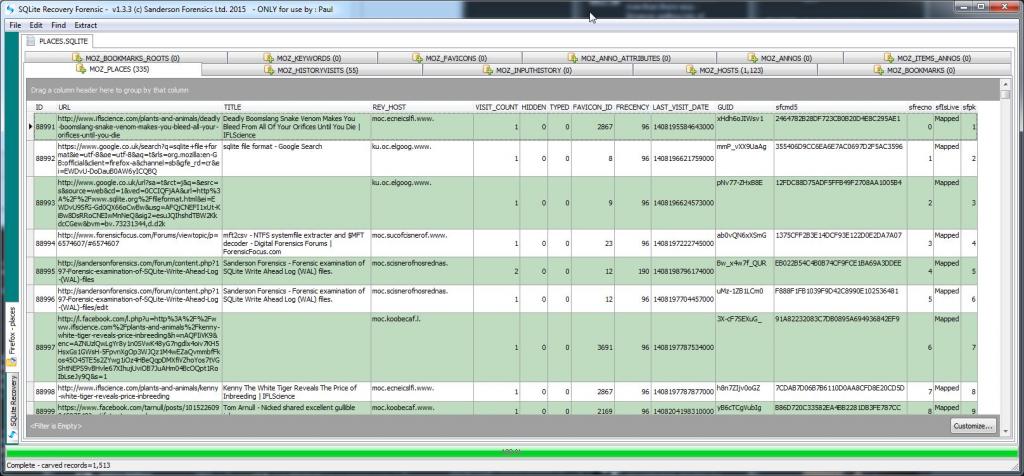
- When you get to the Source file page, select the WAL file you want to carve from (I am carving from a Firefox places WAL file)
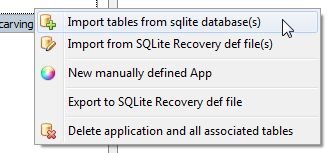
- When you get to the templates page, “right click” the “Apps table” and choose “import tables from sqlite databases”
- Navigate to the Database (in my case filefox places.sqlite file and select it

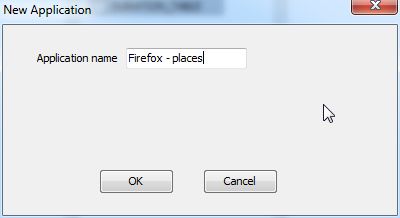
- Call your template something like “Firefox – places”
- Make sure just the new template that you create (Firefox – places in my example) is check marked (you don’t want tabs to be created for all the other applications)
- Uncheck the “Search for database definitions” box – there is no need as we are carving from a known journal

Finally select the output folder for the carved database and hit “Finish”

Once the carve process has completed, a few seconds, you can view each table in turn and review the carved records. Note that the recovered records in this table are logged as “mapped” rather than “Live” as they are not currently live in the associated database (the WAL has not be written to)
Double-clicking on any entry above will take you to a table showing exactly where (byte offset) in the WAL file the recovered record was located.

SQLite Forensic Explorer
While SQLite Forensic Explorer can read and decode pages and records in pages from a WAL file individually, a better solution is obtained if the table schemas from the database that is associated with the WAL file are available to SQLite Forensic Explorer. When this additional information is available the records from WAL file pages can be correctly decoded and presented to the examiner in easier to read grid form.
The process of investigating an SQLite WAL files with SQLite Forensic Explorer is simple.
1. Select “Explore database/WAL file” from the main menu and choose a WAL file
3. Start your investigation.
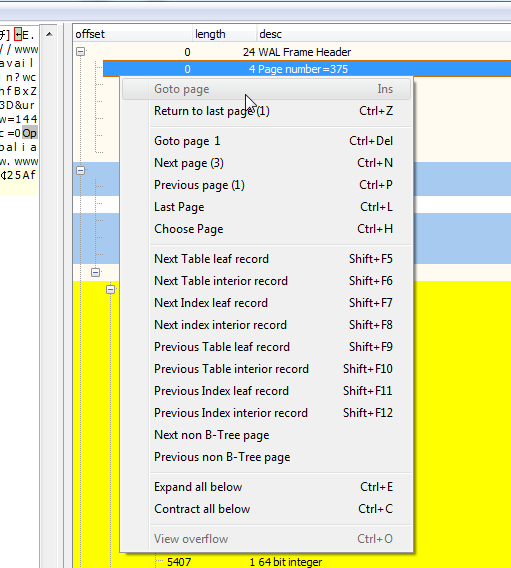
The first page the investigator will see is the 32 byte WAL file header. The information of most value to an investigator here is the Page size and the WAL salt. Every additional page in the WAL is will be page size (in this case 32K) plus 24 bytes in length (the 24 bytes are referred to as WAL frame headers), the salt values from the WAL file header are repeated in every frame header.


Each record is displayed in decoded form in the records display (shown above) and selecting the start of the payload in the hex display pops up a dialogue showing the record inserted into its matching table (obtained from the schema from the associated database) and the record can now be written to a copy database for further examination using additional software such as SkypeAlyzer.

http://www.sqlite.org/draft/wal.html
http://www.sqlite.org/draft/atomiccommit.html